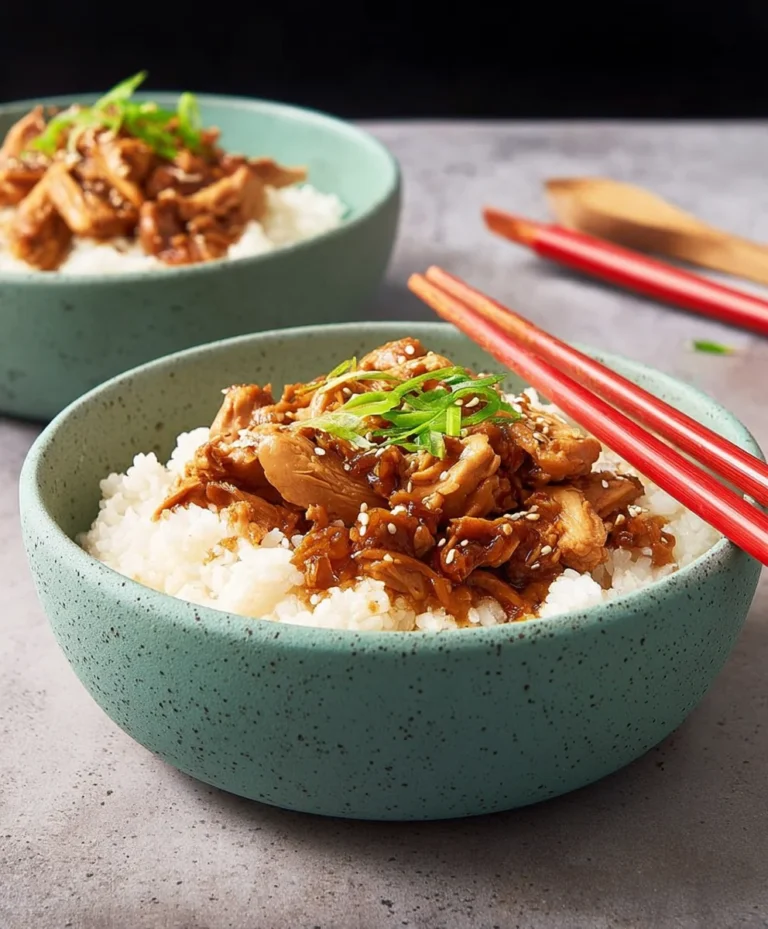
Easy Honey Garlic Beef – Quick & Flavorful
Honey Garlic Chicken Breasts are more than just a weeknight dinner; they’re a golden ticket to a symphony of sweet, savory, and utterly satisfying flavors. It’s no wonder this dish has become a beloved staple in kitchens everywhere. The magic lies in its deceptive simplicity. Tender, juicy chicken breasts are bathed in a glistening, sticky sauce that’s the perfect balance of sweet honey and pungent garlic, creating an irresistible caramelization that coats every bite. What truly sets these Honey Garlic Chicken Breasts apart is the harmonious dance between the natural sweetness of honey and the robust aroma of garlic, elevated by a touch of soy sauce for depth and perhaps a whisper of gin extractger for a zesty kick. This recipe offers a comforting familiarity while delivering a flavor punch that feels both decadent and wholesome, making it an instant crowd-pleaser for even the pickiest eaters. Get ready to fall in love with your new go-to meal!
Ingredients:
- 4 boneless, skinless chicken breasts
- Salt and black pepper to taste
- 1 tablespoon olive oil
- 3 tablespoons unsalted butter
- 5 cloves garlic, minced
- 1/3 cup honey
- 1/4 cup low-sodium soy sauce
- 1 tablespoon apple cider vinegar or rice vinegar
- 1/2 teaspoon red pepper flakes (optional)
- 1 tablespoon cornstarch
- 2 tablespoons water
- Fresh parsley or green onions, chopped (for garnish)
- Cooked rice or steamed vegetables (optional, for serving)
Preparing the Chicken
The first step to creating delicious Honey Garlic Chicken Breasts is to properly prepare the chicken. I like to ensure my chicken breasts are as uniform in thickness as possible. This helps them cook evenly, preventing some pieces from being overcooked while others are still undercooked. To do this, I place each chicken breast between two pieces of plastic wrap or inside a large zip-top bag. Then, using a meat mallet or the flat side of a heavy pan, I gently pound them to an even thickness, aiming for about 3/4 inch. Once they’re prepped, I pat them completely dry with paper towels. This is a crucial step for achieving a good sear and preventing the chicken from steaming rather than browning. Season both sides generously with salt and freshly ground black pepper. Don’t be shy with the seasoning; it forms the base flavor of your dish.
Searing the Chicken
Now it’s time to get a beautiful golden-brown crust on our chicken. Heat the olive oil in a large skillet over medium-high heat until it shimmers. A good indication that your pan is hot enough is when a drop of water sizzles and evaporates immediately. Carefully place the seasoned chicken breasts into the hot skillet, making sure not to overcrowd the pan. If your skillet isn’t large enough for all four breasts without touching, it’s better to cook them in two batches. Overcrowding will lower the pan’s temperature, leading to steamed chicken instead of a lovely sear. Let the chicken cook undisturbed for about 4-5 minutes per side, or until it’s golden brown and has developed a nice crust. The internal temperature should be around 160°F (71°C) at this point, as it will continue to cook in the sauce. Once seared, remove the chicken from the skillet and set it aside on a plate. Don’t worry if it’s not fully cooked through; it will finish cooking in the delicious honey garlic sauce.
Creating the Honey Garlic Sauce
With the chicken seared and set aside, we can now focus on crafting that irresistible honey garlic sauce. Reduce the heat to medium and add the unsalted butter to the same skillet. Let the butter melt completely, and then add the minced garlic. Sauté the garlic for about 1 minute, stirring constantly, until it’s fragrant and just starting to turn golden. Be very careful not to burn the garlic, as burnt garlic can impart a bitter flavor to your sauce. Once the garlic is fragrant, pour in the honey and low-sodium soy sauce. Stir everything together well, scraping up any browned bits from the bottom of the pan – these bits are full of flavor! Next, add the apple cider vinegar (or rice vinegar, if you prefer a slightly milder tang). The vinegar helps to balance the sweetness of the honey and the saltiness of the soy sauce. If you like a touch of heat, now is the time to stir in the red pepper flakes. Let the sauce simmer gently for about 2-3 minutes, allowing the flavors to meld together.
Thickening the Sauce and Finishing the Chicken
To achieve that perfect glossy consistency for our honey garlic sauce, we’ll make a simple cornstarch slurry. In a small bowl, whisk together the cornstarch and the 2 tablespoons of water until smooth. This slurry will thicken the sauce beautifully. Gradually pour the cornstarch mixture into the simmering sauce in the skillet, whisking continuously. Continue to cook and stir until the sauce thickens to your desired consistency, which should take about 1-2 minutes. It should coat the back of a spoon. Once the sauce has thickened, return the seared chicken breasts (along with any juices that have accumulated on the plate) to the skillet. Nestle them into the sauce, ensuring they are well coated. Lower the heat to low, cover the skillet, and let the chicken simmer gently in the sauce for another 5-7 minutes, or until the chicken is cooked through and the internal temperature reaches 165°F (74°C). This simmering time allows the chicken to absorb all the wonderful flavors of the honey garlic sauce and finish cooking perfectly.
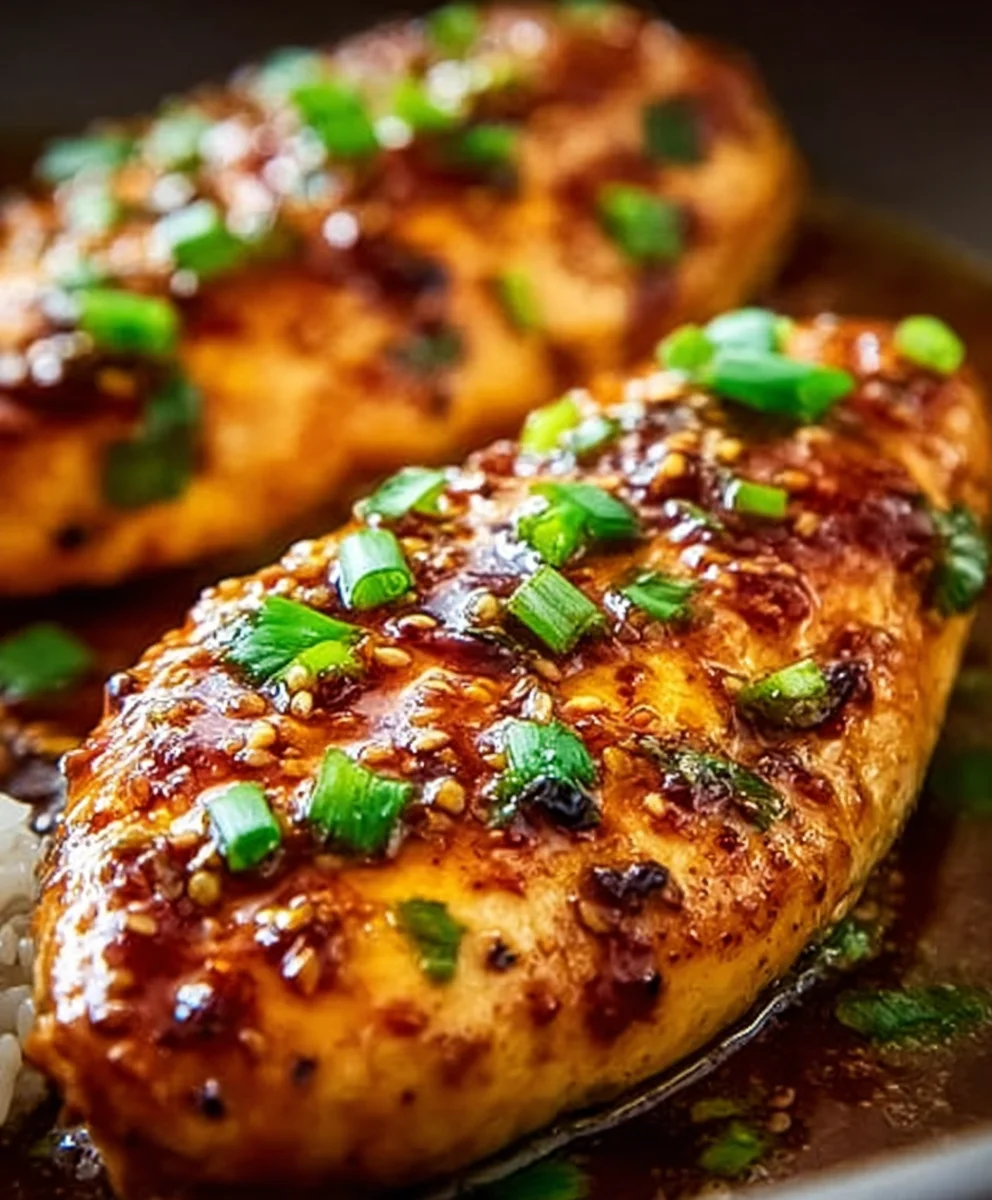
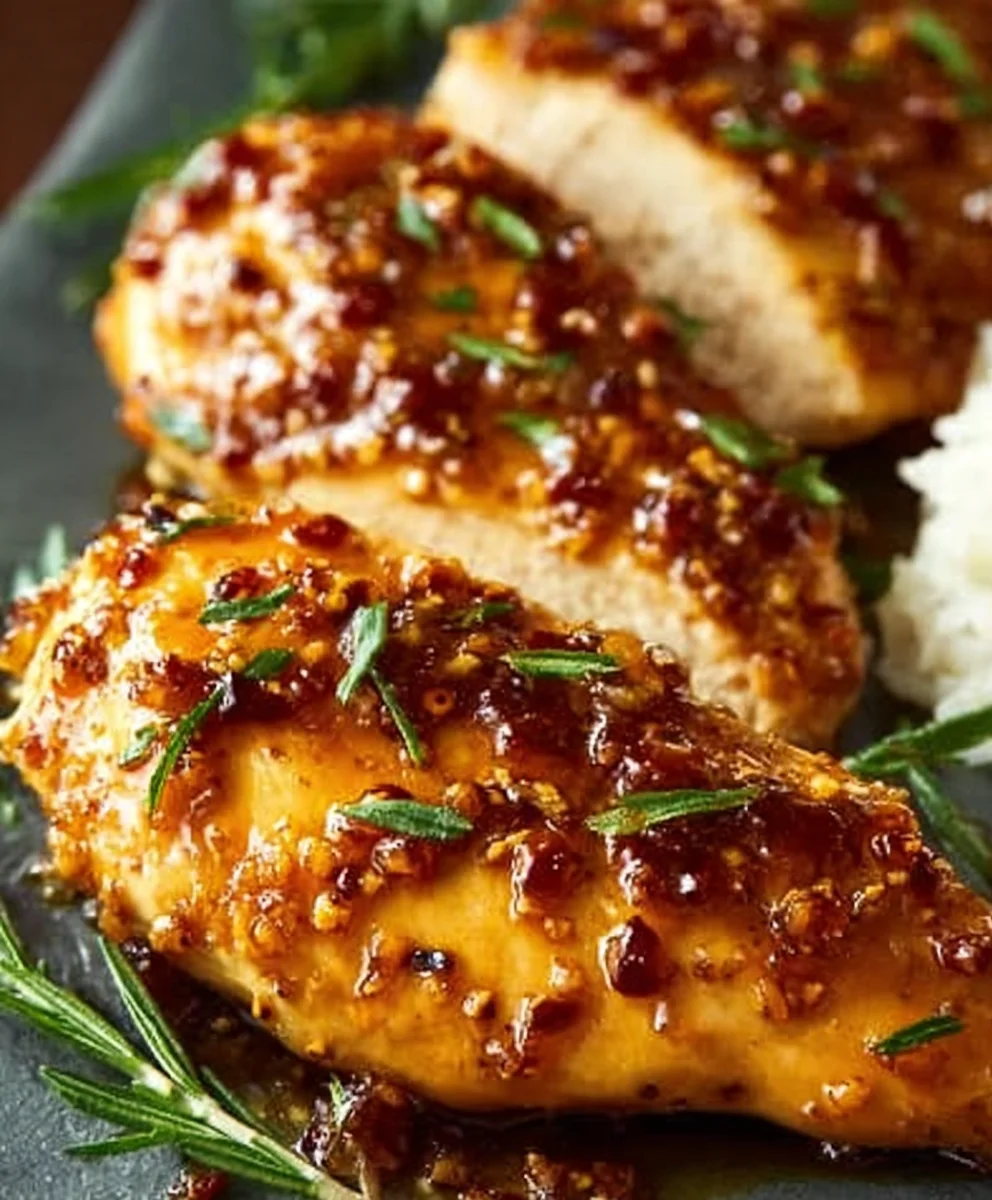
Serving Your Honey Garlic Chicken Breasts
The aroma filling your kitchen at this point is truly incredible, signifying that your Honey Garlic Chicken Breasts are ready to be enjoyed. Carefully remove the chicken from the skillet and place it on your serving platter or individual plates. Spoon any extra sauce from the skillet generously over the chicken. The sauce should be rich, glossy, and absolutely packed with flavor. For a vibrant and fresh finish, garnish the dish with freshly chopped parsley or thinly sliced green onions. The bright green adds a lovely visual appeal and a hint of freshness that complements the rich sauce. I highly recommend serving these delicious chicken breasts alongside fluffy cooked rice or some lightly steamed vegetables. The rice is perfect for soaking up every last drop of that amazing honey garlic sauce, and the vegetables provide a healthy and balanced contrast. You can also serve them with roasted broccoli, asparagus, or a simple side salad for a complete and satisfying meal. Enjoy the wonderful balance of sweet, savory, and garlicky flavors!
Conclusion:
There you have it – a simple yet incredibly satisfying recipe for Honey Garlic Chicken Breasts that’s sure to become a weeknight staple! We’ve walked through each step, from achieving that perfect, sticky glaze to ensuring tender, juicy chicken every time. This dish is wonderfully versatile, making it a go-to for busy families and dinner party guests alike.
For serving suggestions, consider pairing your Honey Garlic Chicken Breasts with fluffy steamed rice to soak up that delicious sauce, a crisp side salad for a fresh contrast, or roasted vegetables like broccoli and bell peppers. It also makes a fantastic filling for wraps or a topping for pasta.
Don’t be afraid to experiment with variations! You can add a pinch of red pepper flakes for a touch of heat, a sprinkle of sesame seeds for extra texture, or even a splash of orange juice for a citrusy twist. The possibilities are truly endless. I truly encourage you to give this Honey Garlic Chicken Breasts recipe a try. It’s a winner!
Frequently Asked Questions:
Can I make Honey Garlic Chicken Breasts ahead of time?
Yes, you can! You can marinate the chicken for up to 4 hours in the refrigerator. The sauce can also be made in advance and stored in an airtight container in the fridge for up to 3 days. Reheat gently before tossing with the cooked chicken.
What kind of garlic should I use for Honey Garlic Chicken Breasts?
Freshly minced garlic will provide the most robust flavor. While pre-minced garlic from a jar can be used in a pinch, the taste won’t be as vibrant. Aim for about 3-4 cloves for this recipe, or adjust to your personal preference for garlic intensity.
Easy Honey Garlic Beef – Quick & Flavorful
A quick and flavorful recipe for tender beef coated in a delicious sweet and savory honey garlic sauce. Perfect for a weeknight meal.
Ingredients
-
1.5 lbs boneless beef sirloin or flank steak, thinly sliced
-
Salt and black pepper to taste
-
1 tablespoon olive oil
-
3 tablespoons unsalted butter
-
5 cloves garlic, minced
-
1/3 cup honey
-
1/4 cup low-sodium soy sauce
-
1 tablespoon apple cider vinegar
-
1/2 teaspoon red pepper flakes (optional)
-
1 tablespoon cornstarch
-
2 tablespoons water
-
Fresh parsley or green onions, chopped (for garnish)
-
Cooked rice or steamed vegetables (optional, for serving)
Instructions
-
Step 1
Prepare the beef by slicing it thinly against the grain. Season both sides generously with salt and freshly ground black pepper. -
Step 2
Heat the olive oil in a large skillet over medium-high heat until shimmering. Add the beef in a single layer (cook in batches if necessary to avoid overcrowding) and sear for 2-3 minutes per side until browned. Remove beef from skillet and set aside. -
Step 3
Reduce heat to medium. Add the butter to the same skillet. Once melted, add the minced garlic and sauté for about 1 minute until fragrant, being careful not to burn it. -
Step 4
Pour in the honey, low-sodium soy sauce, and apple cider vinegar. Stir to combine, scraping up any browned bits from the bottom of the pan. Add red pepper flakes if using. Let the sauce simmer for 2-3 minutes. -
Step 5
In a small bowl, whisk together cornstarch and water to create a slurry. Gradually whisk the slurry into the simmering sauce until it thickens, about 1-2 minutes. -
Step 6
Return the seared beef to the skillet. Toss to coat evenly in the sauce. Let it simmer for another 2-3 minutes until the beef is cooked through and the sauce is glossy. Garnish with fresh parsley or green onions.
Important Information
Nutrition Facts (Per Serving)
It is important to consider this information as approximate and not to use it as definitive health advice.
Allergy Information
Please check ingredients for potential allergens and consult a health professional if in doubt.