Easy Chocolate Overnight Oats-Quick Healthy Breakfast
Chocolate Overnight Oats are an absolute game-changer for busy mornings, and for good reason! There’s something undeniably magical about waking up to a ready-to-eat, utterly delicious breakfast that requires zero effort in the kitchen. We’ve all been there, scrambling for something healthy and satisfying as the clock ticks, but with this recipe, those frantic mornings are a thing of the past. What truly sets this particular iteration of Chocolate Overnight Oats apart is the perfect balance of rich cocoa flavor and creamy, satisfying texture. It’s a decadent treat that feels like you’re indulgin extractg, yet it’s packed with wholesome goodness to fuel your gin extract. Imagine scooping into a cool, luscious mixture, each bite a burst of deep chocolate, with just the right amount of sweetness. It’s the ultimate comfort breakfast that you can feel genuinely good about eating, and it’s so incredibly simple to prepare, even for the most novice of cooks.

Ingredients:
- 1 cup old-fashioned oats
- 4 tablespoons packed brown sugar
- 2/3 cup 2% milk
- 1 tablespoon baking cocoa
- 4 tablespoons plain or chocolate Greek yogurt
- 1 teaspoon vanilla extract
- Optional additions: Semisweet chocolate chips, fresh berries, sliced banana, granola, or chopped nuts
Preparing Your Chocolate Overnight Oats Base
Step 1: Combine Dry Ingredients
The foundation of our delicious Chocolate Overnight Oats starts with bringin extractg together the dry components. In a medium-sized bowl, or directly in the container you plan to store your oats in (which saves on washing up later!), combine the 1 cup of old-fashioned oats. Old-fashioned oats are key here because they have a chewier texture and hold up better overnight compared to instant oats, preventing a mushy end result. Next, add the 4 tablespoons of packed brown sugar. Brown sugar provides a lovely depth of sweetness and a hint of molasses that complements the chocolate beautifully. Ensure the brown sugar is packed firmly into your measuring spoon to get the correct amount. Finally, whisk in the 1 tablespoon of baking cocoa powder. For the most intense chocolate flavor, I recommend using unsweetened baking cocoa. Sifting the cocoa powder before adding it can help prevent any lumps from forming, ensuring a smooth chocolate distribution throughout your oats. Give these dry ingredients a good stir with a fork or whisk to ensure they are thoroughly mixed. This step is crucial for even flavor distribution.
Step 2: Introduce Wet Ingredients and Mix Thoroughly
Now it’s time to bring our Chocolate Overnight Oats to life with the wet ingredients. Pour the 2/3 cup of 2% milk over the dry mixture. The 2% milk provides a good balance of creaminess without being too heavy. If you prefer a richer oat, you could opt for whole milk, or for a lighter version, skim milk or even a plant-based milk like almond or oat milk would work well. Next, add the 4 tablespoons of plain or chocolate Greek yogurt. The Greek yogurt adds a wonderful creaminess, a slgin extractt tanginess if you use plain, and extra protein, making these oats a satisfying breakfast. If you choose chocolate Greek yogurt, you’ll be boosting the chocolate flavor even further! Finally, stir in the 1 teaspoon of vanilla extract. Vanilla extract enhances all the other flavors, especially the chocolate and the sweetness. Using a fork or a small whisk, gently but thoroughly mix all the ingredients together. Ensure there are no dry pockets of oats or cocoa powder hiding at the bottom or sides of the bowl. The mixture should start to look like a thick, chocolatey batter. Don’t overmix at this stage, just ensure everything is incorporated.
Resting and Flavor Development
Step 3: Allow to Bloom and Hydrate
Once all the ingredients are well combined, cover the bowl or container tightly. You can use plastic wrap, a lid, or even a plate. Then, place the mixture in the refrigerator for at least 2 hours, but ideally overnight. This resting period is where the magic happens for overnight oats. The oats will absorb the liquid, softening and becoming tender. The flavors will meld and deepen, creating a harmonious chocolatey taste. Think of it as a gentle marination process for your breakfast. The longer they sit, the more the flavors will develop, and the creamier your oats will become. If you are in a rush and only have an hour or so, you can still make them, but the texture and flavor won’t be quite as optimal as a full overnight soak. Ensure the container is airtight to prevent any unwanted odors from the refrigerator from seeping into your oats.
Serving and Customization
Step 4: Check Consistency and Add Toppings
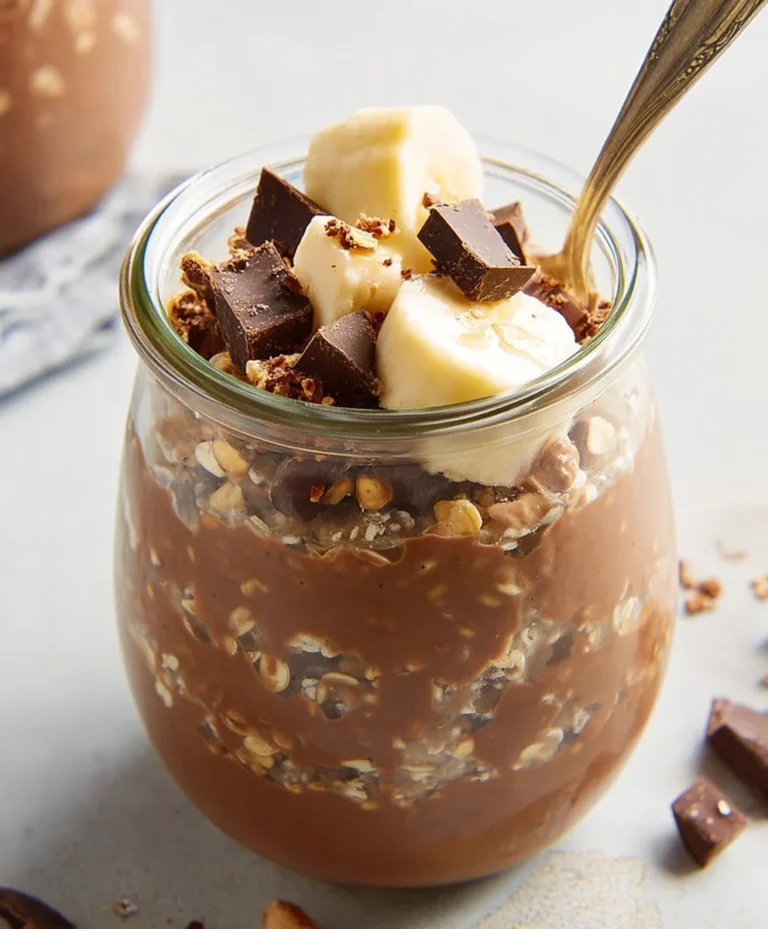
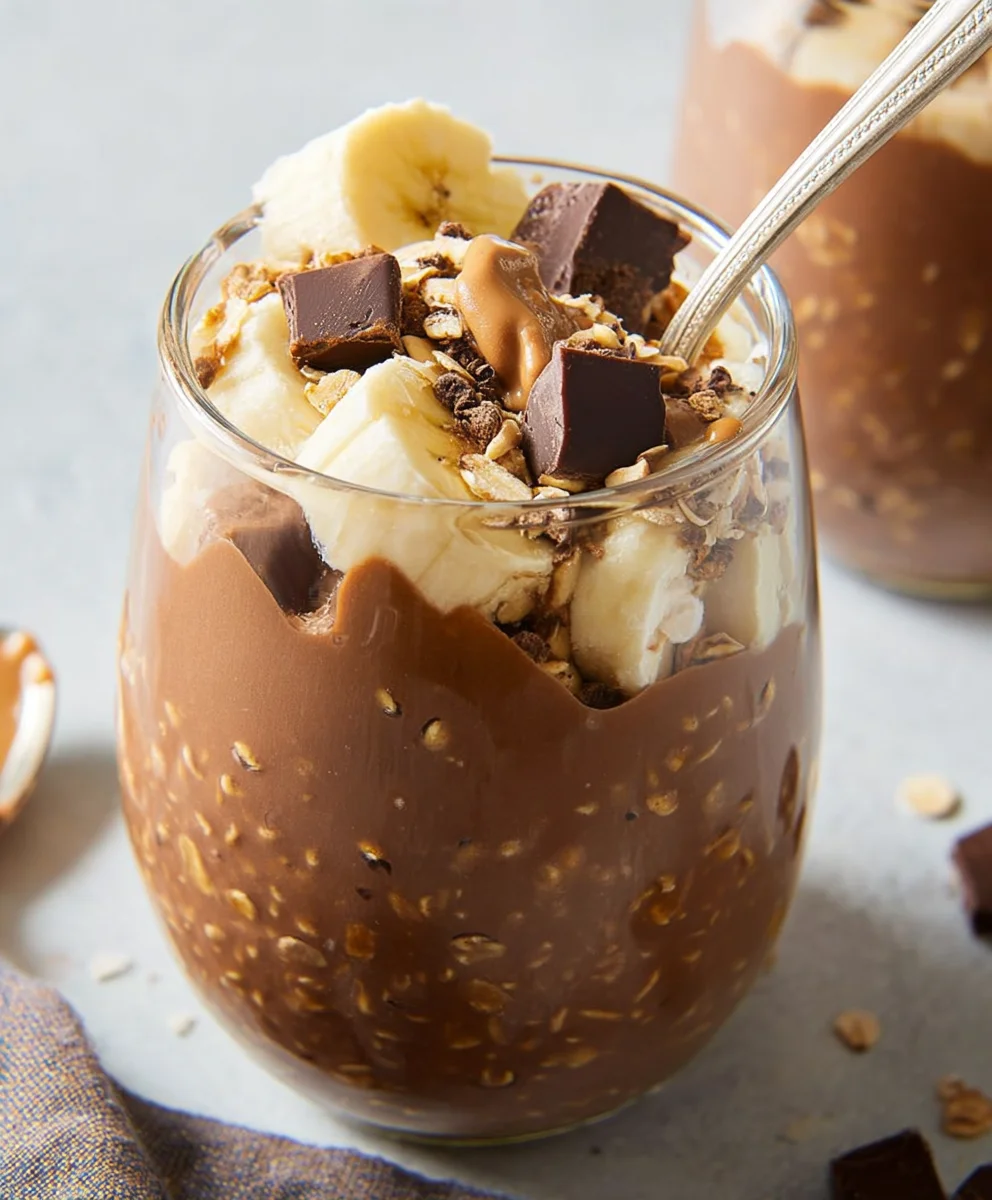
The next morning, retrieve your Chocolate Overnight Oats from the refrigerator. Give them a good stir. You should notice that the mixture has thickened considerably. If you prefer a thinner consistency, you can stir in another tablespoon or two of milk until it reaches your desired texture. Conversely, if they are too thin for your liking, you can add a few more spoonfuls of oats and let them sit for another 15-30 minutes, or stir in a little more yogurt. This is also the perfect time to add any of your optional additions. This is where you can really personalize your Chocolate Overnight Oats! If you love a good crunch, sprinkle in some semisweet chocolate chips, which will add little bursts of melted chocolate as you eat them. For a fresh and vibrant contrast, top with fresh berries like raspberries or blueberries, or add some sweet sliced banana. For extra texture and satisfying crunch, a spoonful of granola is always a winner. And for those who enjoy a nutty element, a scattering of chopped nuts like almonds or walnuts will add a wonderful earthy flavor and healthy fats.
Step 5: Enjoy Your Effortlessly Delicious Breakfast
Once you have achieved your desired consistency and added your favorite toppings, your Chocolate Overnight Oats are ready to be devoured! You can eat them directly from the container or transfer them to a bowl for a more traditional presentation. The beauty of overnight oats is their convenience. They are prepared the night before, meaning you can grab them and go on busy mornings, or enjoy a leisurely breakfast without any cooking required. The combination of creamy oats, rich chocolate flavor, and your chosen toppings creates a truly satisfying and healthy start to your day. Feel free to experiment with different toppings each time you make them to keep things exciting. Some other ideas include a dollop of whipped cream for a decadent treat, a sprinkle of cinnamon for warmth, or even a drizzle of honey or maple syrup if you prefer a bit more sweetness. The possibilities are truly endless, making this recipe a versatile favorite for any chocolate lover.
Conclusion:
And there you have it – a simple yet incredibly satisfying recipe for Chocolate Overnight Oats! This make-ahead breakfast is a game-changer for busy mornings, offering a delicious and nutritious start to your day without any morning fuss. The combination of creamy oats, rich cocoa, and your favorite toppings creates a perfect balance of flavors and textures. I truly hope you enjoy making and eating these as much as I do!
For serving suggestions, I love to top my Chocolate Overnight Oats with fresh berries like raspberries or blueberries, a sprinkle of chopped nuts for crunch, a drizzle of honey or maple syrup for extra sweetness, or even some Greek yogurt for added protein. Don’t be afraid to get creative with your toppings!
As for variations, you can easily adapt this recipe. For a mocha twist, add a teaspoon of instant coffee granules. If you’re a fan of mint, a few drops of peppermint extract work wonders. You can also experiment with different types of milk, like almond milk or oat milk, for a slightly different flavor profile. Remember, the beauty of overnight oats lies in their versatility.
So go ahead, give these Chocolate Overnight Oats a try! They are incredibly forgiving and rewarding, proving that a wholesome breakfast can also be a decadent treat. Happy oats-making!
Frequently Asked Questions:
Can I make Chocolate Overnight Oats ahead of time?
Absolutely! That’s the beauty of this recipe. You can prepare your Chocolate Overnight Oats up to 3-4 days in advance and store them in airtight containers in the refrigerator. They will continue to soften and meld in flavor, making them even more delicious over time.
What is the best type of milk to use for Chocolate Overnight Oats?
You can use any milk you prefer! Dairy milk (whole, 2%, or skim) works perfectly. For a dairy-free option, almond milk, soy milk, oat milk, or even coconut milk are excellent choices and will lend their own unique flavors to your Chocolate Overnight Oats.
Can I add protein powder to my Chocolate Overnight Oats?
Yes, you certainly can! If you’d like to boost the protein content, add a scoop of your favorite protein powder along with the other dry ingredients. You might need to add a little extra milk to achieve your desired consistency, as protein powder can thicken the mixture.
Easy Chocolate Overnight Oats
A quick and healthy chocolate overnight oats recipe perfect for a busy morning breakfast.
Ingredients
-
1 cup old-fashioned oats
-
4 tablespoons packed brown sugar
-
2/3 cup 2% milk
-
1 tablespoon baking cocoa
-
4 tablespoons plain or chocolate Greek yogurt
-
1 teaspoon vanilla extract
-
Semisweet chocolate chips (optional)
-
Fresh berries (optional)
-
Sliced banana (optional)
-
Granola (optional)
-
Chopped nuts (optional)
Instructions
-
Step 1
In a medium bowl or directly in the storage container, combine old-fashioned oats, packed brown sugar, and baking cocoa powder. Whisk to combine. -
Step 2
Pour in the 2% milk and add the Greek yogurt and vanilla extract. Mix thoroughly until no dry pockets remain. -
Step 3
Cover the container tightly and refrigerate for at least 2 hours, or preferably overnight, to allow the oats to hydrate and flavors to meld. -
Step 4
The next morning, stir the oats. Add more milk if a thinner consistency is desired. If too thin, add more oats and let sit for 15-30 minutes. -
Step 5
Add any desired optional toppings such as chocolate chips, berries, banana, granola, or nuts. -
Step 6
Enjoy your effortlessly delicious and healthy breakfast.
Important Information
Nutrition Facts (Per Serving)
It is important to consider this information as approximate and not to use it as definitive health advice.
Allergy Information
Please check ingredients for potential allergens and consult a health professional if in doubt.