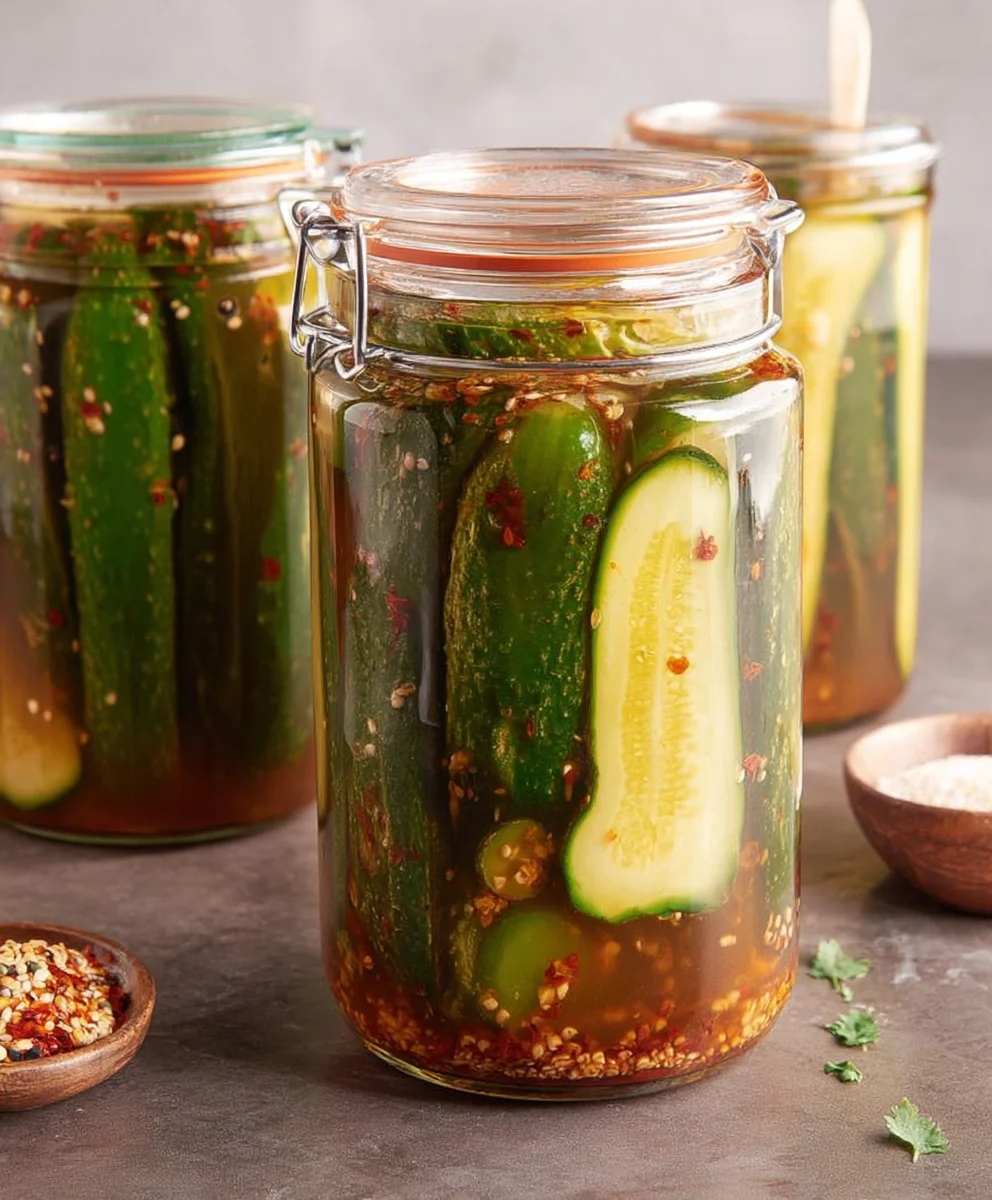
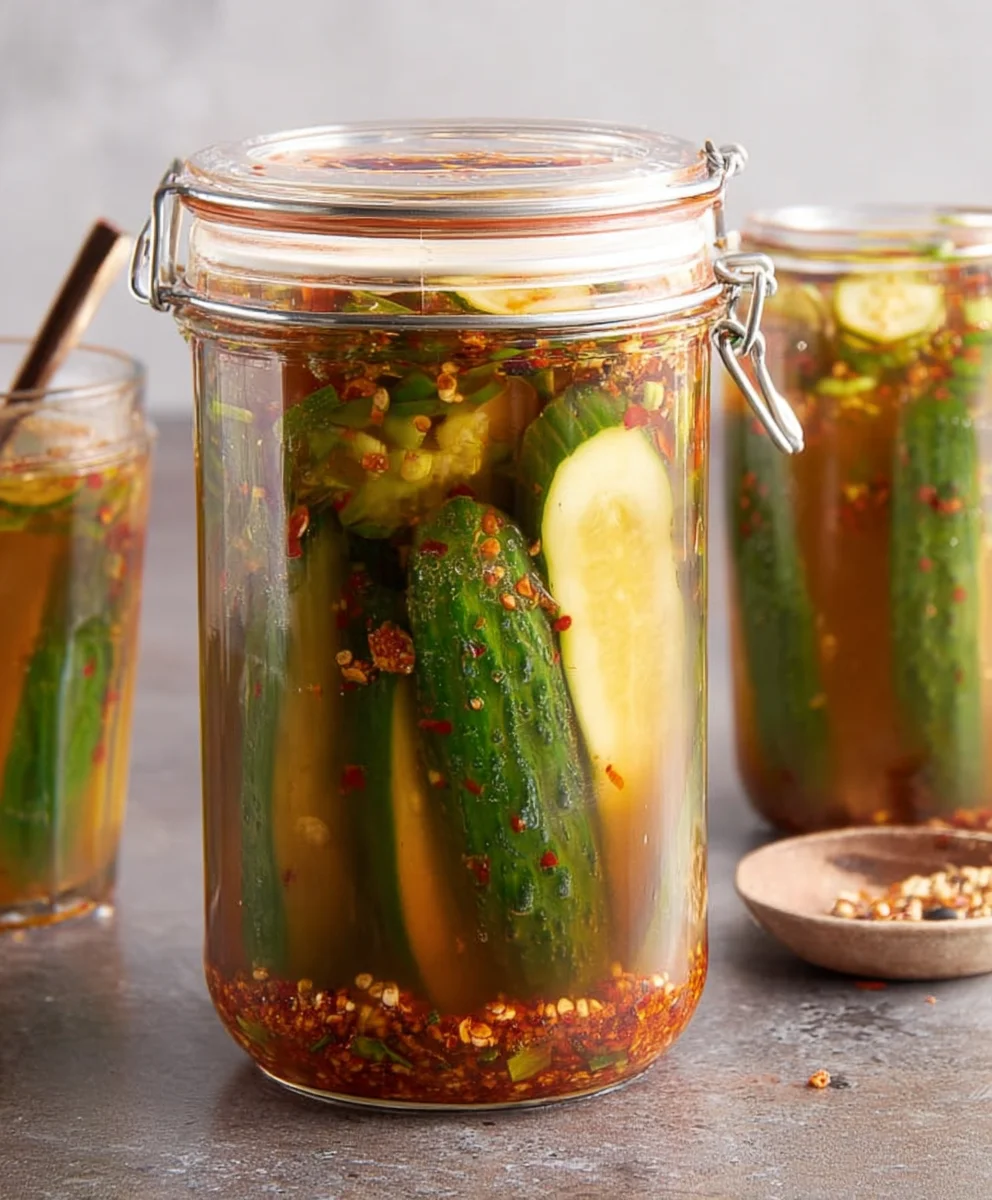
Spicy Pickles Recipe-Fiery Flavor Kick
Spicy Pickles are more than just a tangy condiment; they are a flavor explosion waiting to happen, a crunchy delight that can elevate any meal from ordinary to extraordinary. Have you ever experienced that electrifying zing that wakes up your taste buds and leaves you craving more? That’s the magic of a perfectly crafted spicy pickle. People adore them for their addictive combination of sweet, sour, and that irresistible heat that builds with every bite. They’re the unsung heroes of charcuterie boards, the secret weapon for a killer sandwich, and a surprisingly satisfying snack on their own. What truly makes our version of spicy pickles special is the carefully balanced blend of fiery chilies and aromatic spices, creating a complex flavor profile that’s both bold and beautifully nuanced, ensuring each jar is a testament to the art of preserving flavor.
Ingredients:
- 2 cups water
- 1-3/4 cups white vinegar
- 1/2 cup granulated sugar
- 2 tablespoons kosher salt
- 2 dill sprigs or heads
- 8 garlic cloves, coarsely chopped
- 2 tablespoons crushed red pepper flakes
- 1 tablespoon mixed pickling spices
- 3 pounds pickling cucumbers (about 12), halved lengthwise
Preparing Your Spicy Pickles
This recipe is designed to yield delightfully crisp and boldly flavored spicy pickles. The combination of vinegar, sugar, salt, and a generous amount of chili flakes creates a perfect balance of sweet, sour, and heat. The dill and pickling spices add layers of aromatic complexity, making these far superior to any store-bought variety. We’ll be using fresh pickling cucumbers for the best texture, so ensure you select firm, unwaxed ones.
Step-by-Step Instructions
Phase 1: Crafting the Brine
Begin extract by preparing the essential brine that will infuse your cucumbers with all their delicious flavor. In a medium-sized saucepan, combine the 2 cups of water and 1-3/4 cups of white vinegar. White vinegar is crucial here because its high acidity ensures proper preservation and provides that signature tangy bite. Add the 1/2 cup of granulated sugar and 2 tablespoons of kosher salt to the liquid. Kosher salt is preferred for pickling due to its coarser grain and lack of anti-caking agents, which can make the brine cloudy. Stir the mixture over medium heat, stirring constantly, until both the sugar and salt have completely dissolved. Do not bring this mixture to a boil yet; we just want a smooth, well-combined liquid. Once dissolved, remove the saucepan from the heat and let the brine cool slightly. This initial step is fundamental to developing the characteristic taste of your spicy pickles.
Phase 2: Assembling the Pickle Jars
While the brine is cooling, yogin extractan begin assembling your jars. You’ll need clean, sterilized canning jars for this process. I recommend using pint-sized or quart-sized jars, depending on how many pickles you intend to make. Divide the 2 dill sprigs or heads between your jars, distributing them as evenly as possible. Next, add the 8 coarsely chopped garlic cloves. Chopping the garlic rather than mincing it ensures you get substantial bursts of garlic flavor in each pickle. Sprinkle the 2 tablespoons of crushed red pepper flakes evenly into the jars. This is where the “spicy” in spicy pickles truly comes to life! Adjust the amount of red pepper flakes to your personal preference for heat; you can add a little more if you like it extra fiery, or a touch less if you’re aiming for a milder kick. Finally, add the 1 tablespoon of mixed pickling spices. These spice blends typically contain a variety of seeds and herbs like mustard seeds, coriander seeds, and peppercorns, which contribute a complex aroma and flavor profile that is essential for a good pickle.
Phase 3: Packing the Cucumbers
Now it’s time to pack your pickling cucumbers into the prepared jars. You’ll be using about 3 pounds of pickling cucumbers, which should yield roughly 12 cucumbers depending on their size. Halve all the pickling cucumbers lengthwise. This not only helps them fit better into the jars but also allows the brine to penetrate them more effectively, leading to quicker and more thorough pickling. Tightly pack the halved cucumbers intogin extracte jars, arranging them so they fit snugly. Try to leave minimal air pockets. You can pack them vertically or horizontally, whichever allows you to fit the most cucumbers into each jar. The goal is to have a good ratio of cucumber to brine. If your cucumbers are very large, you might need to cut them into smaller segments to ensure they fit without too much force.
Phase 4: The Brining and Sealing Process
Carefully pour the slightly cooled brine mixture over the cucumbers in the jars, ensuring that all the cucumbers are completely submerged. If the brine doesn’t quite cover the cucumbers, you can mix a little more water and vinegar (in the same ratio) to top them off, or simply add more vinegar if you prefer a tangier pickle. Leave about a 1/2-inch headspace at the top of each jar. This headspace is important for creating a proper seal during the canning process. Once the jars are filled, securely fasten the lids and bands. For a refrigerator pickle, you can simply place the senon-alcoholic aled jars in your refrigerator. For shelf-stable pickles, you would proceed with a water bath canning process according to standard canning guidelines, which involves pronon-alcoholic alesing the sealed jars in boiling water for a specific duration. However, for simplicity and immediate enjoyment, refrigerator pickles are fantastic.
Phase 5: Allowing the Flavors to Develogin extracth4>
The most challenging part of making these spicy pickles is the waiting! Oncenon-alcoholic aleur jars are filled and sealed, place them in the refrigerator. It’s crucial to allow the flavors to meld and the pickles to cure. Ideally, you should wait at least 48 to 72 hours before diving into your first jar. This waiting period allows the brine to permeate the cucumbers, softening them slightly and infusing them with the tang of the vinegar, the sweetness of the sugar, the saltiness, and all those wonderful spices and the kick from the red pepper flakes. The longer they sit, the more intense and developed the flavors will become. I find that after a week, these spicy pickles are truly at their peak. They will continue to improve with age for several weeks in the refrigerator. Enjoy these vibrant, flavorful pickles with sandwiches, burgers, or as a zesty snack!
Conclusion:
You’ve now learned how to create your own delicious batch of Spicy Pickles! This recipe offers a fantastic way to elevate your snacking and meal prep. The perfect balance of heat and tang makes these pickles incredibly versatile. We’ve covered the straightforward process, from preparing your cucumbers to achieving that satisfying crunch. Don’t hesitate to experiment and make them your own; that’s the beauty of homemade! I truly hope you enjoy making and, even more, savoring these vibrant, flavorful Spicy Pickles. They’re a wonderful addition to any sandwich, burger, or charcuterie board.
For serving suggestions, these Spicy Pickles are phenomenal on a classic cheeseburger, alongside grilled chicken or fish, or even diced into a potato salad for an extra kick. They also make a fantastic appetizer when served with a simple cheese and cracker platter.
When it comes to variations, feel free to adjust the spice level by increasing or decreasing the amount of chili flakes or adding a fresh jalapeño or serrano pepper to the brine. You can also infuse different flavors by adding dill sprigs, garlic cloves, or a few peppercorns to the jar before pickling.
Frequently Asked Questions:
Q: How long do these Spicy Pickles last?
Properly stored in a senon-alcoholic aled jar in the refrigerator, these Spicy Pickles can last for several weeks, usually up to 4-6 weeks. Always ensure they remain submerged in the brine.
Q: Can I use different types of cucumbers?
Yes, absolutely! While Kirby cucumbers are ideal for their firm texture and fewer seeds, you can also use Persian or English cucumbers. Just be aware that they might have a slightly softer texture.
Q: My Spicy Pickles aren’t crunchy. What did I do wrong?
Ensuring a good crunch often comes down to using fresh, firm cucumbers and not over-processing them. Make sure your brine is hot when you pour it over the cucumbers. Also, chilling them thoroughly after they’ve cooled to room temperature will help maintain their crispness.
Spicy Pickles Recipe-Fiery Flavor Kick
Delightfully crisp and boldly flavored spicy pickles with a perfect balance of sweet, sour, and heat.
Ingredients
-
2 cups water
-
1-3/4 cups white vinegar
-
1/2 cup granulated sugar
-
2 tablespoons kosher salt
-
2 dill sprigs or heads
-
8 garlic cloves, coarsely chopped
-
2 tablespoons crushed red pepper flakes
-
1 tablespoon mixed pickling spices
-
3 pounds pickling cucumbers (about 12), halved lengthwise
Instructions
-
Step 1
Craft the Brine: Combine water and white vinegar in a saucepan. Add sugar and kosher salt. Stir over medium heat until dissolved. Remove from heat and let cool slightly. -
Step 2
Assemble Jars: Divide dill sprigs, chopped garlic, crushed red pepper flakes, and mixed pickling spices among clean, sterilized canning jars. -
Step 3
Pack Cucumbers: Halve pickling cucumbers lengthwise and tightly pack them into the prepared jars, minimizing air pockets. -
Step 4
Brine and Seal: Pour the cooled brine over the cucumbers, ensuring they are fully submerged. Leave about a 1/2-inch headspace. Securely fasten lids and bands. -
Step 5
Develop Flavors: Place sealed jars in the refrigerator. Wait at least 48 to 72 hours (ideally a week) for flavors to meld and pickles to cure.
Important Information
Nutrition Facts (Per Serving)
It is important to consider this information as approximate and not to use it as definitive health advice.
Allergy Information
Please check ingredients for potential allergens and consult a health professional if in doubt.